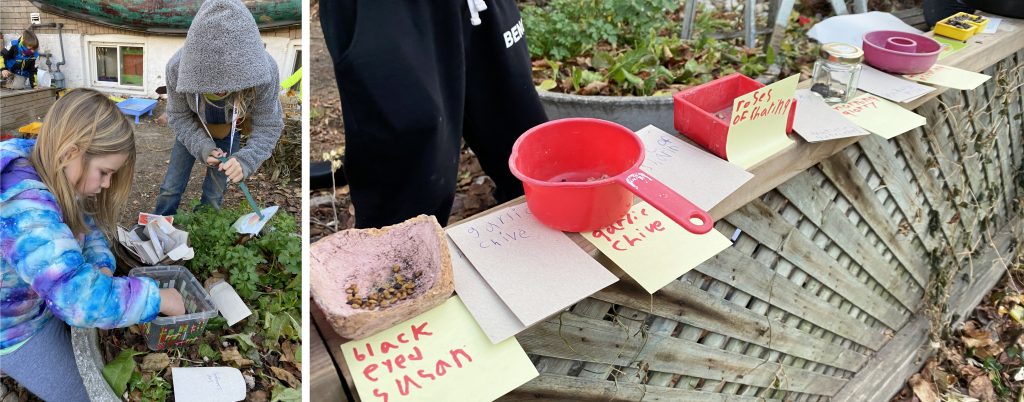
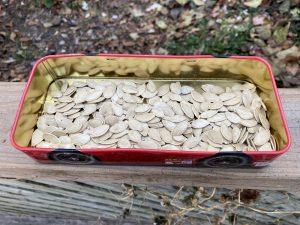
Like many gardeners I go kicking and screaming into winter. Grey skies, slushy sidewalks and short days without time spent in my lush and colourful garden is a bummer, plain and simple. However, when I bundle up and venture out despite my reluctance, I discover little glimmers of life in the sleeping garden. When I look closely, I find seeds everywhere. And where there are seeds, there is hope! And a reminder that it’s seed saving time.
![]()
![]()
![]()
![]()
![]()
Some Background
Before we dive into the how-to of seed saving, a bit of background:
The process of saving seeds for sowing the following year goes back to when the planting of annual crops first began, some 12,000 years ago. Then, it was a matter of survival. Without seeds, there is no food except for meat, which itself came along with risks of its own (yes, the Sabre Tooth Tiger was real, and lived right around the same time).
Seed saving remains today, an act of survival. Yet we have become disconnected from this simple fact and rely on those who grow and produce our food to do the seed saving for us, and we give up a lot when we hand this task over to others. Our choice of crops and how they are grown is too often dominated by corporations that are more concerned with profits than the health of the planet and all its inhabitants, above and below the soil.
As gardeners and growers of our own food I believe it is our right, honour and responsibility to save our seeds so we can contribute to building and maintaining a just food system that allows healthy food to be accessible to all, a system that protects and builds biodiversity and resilience.
Of course, it’s not just at-home gardeners who save their own seeds. There are many community groups and non-profit organizations that organize, educate, advocate and work side by side with seed growers as well as small and large scale, independent or family farmers all over the world. These are the leaders who, with their knowledge and dedication, work daily to protect food sovereignty and security.
The Bauta Family Initiative on Canadian Seed Security is a far-reaching project established in 2012 and delivered by Seed Change in partnership with Seeds of Diversity who work with a variety of stakeholders who are taking action “… to increase the quality, quantity, and diversity of ecological seed grown in Canada while honouring the wisdom of farmers.”
NOT-SO-FUN FACT:According to Seed Change, Seventy per cent of the world’s food is grown by 2 billion family farmers. Nearly half of them live below the poverty line. |
Seed Change, formerly USC Canada, is a charitable institution that has been “…seeding change since 1945”. Their impressive list of projects take them around the world in support of farmers, advocating for their rights, helping them save, share and breed new seeds, restore degraded land, launch enterprises to increase farmers’ incomes, and find solutions to climate change and water shortages.
Seeds of Diversity is a national, member-driven group of volunteers who save and share seeds, organize events and teach people how to save seeds. They publish How To Save Seed literature and they are the driving force behind the popular Seedy Saturday and Seedy Sunday events held in early spring in local communities. These events, where participants buy, sell, share, and trade seeds, are free and open to all. Workshops and other inspirational learning opportunities are frequently on offer. These are must-do events that connect like-minded individuals and organizations of all experience levels. If you haven’t been to a Seedy Event yet, it’s highly recommended! Check out the Seeds of Diversity web site to find one in your neighbourhood.
From the Seeds of Diversity Website: “…in the 20th century alone, 75 per cent of crop diversity has been lost. When you plant seeds you’ve saved yourself, or seeds you purchased from an independent seed company in your area, you help preserve seed diversity.”
Seed saving is not only good for the planet, it’s good for you and your family. It’s fun, easy and a great way to reconnect with nature. All you really need is a place to dry and thresh or shuck your seeds, paper envelops, a pen, and your seeds of course.
![]()
![]()
![]()
![]()
![]()
How To Save Seeds
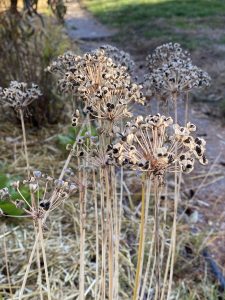
You will learn a bit about botany as you go through the seed saving process. Different plants have different growth patterns and anatomy, so they develop and store their seeds in different ways. Crops like tomatoes and squashes contain seeds within their fruits. Many vegetables like carrots, dill or fennel contain their seeds within a flower head. Carrots are biennial, so they flower in their second season, while brassicas such as arugula flower and produce seed pods on the flower stem. Some seeds like beans or peas can simply be dried and packaged while tomato seeds need to be released from a gelatinous shell through a fermentation process.
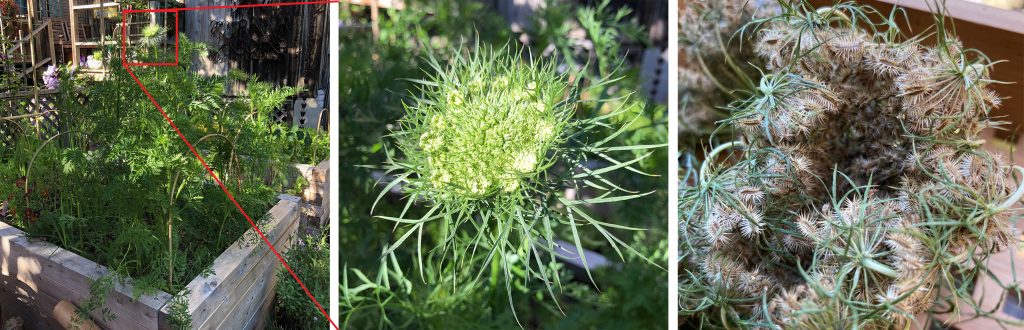
Carrot flowers becoming carrot seeds
Step 1: Harvest
Have a look around your garden with a container of some kind and your pruners. Seeds can be saved throughout the season, as flower heads dry and droop, as pea pods shrivel on the vine or as harvested fruits are sliced open and their seeds revealed. So don’t confine your practice to just the fall but rather hunt throughout the growing season. Look for dried seed pods or brown and flopped over seed heads. The more dead looking the better because the seed continues to develop and mature as it dries on the plant. If you want to save your favorite tomato seeds, choose the best, most ripe fruit at the peak of the season and don’t eat it! Scoop out the seeds and proceed to step 2.

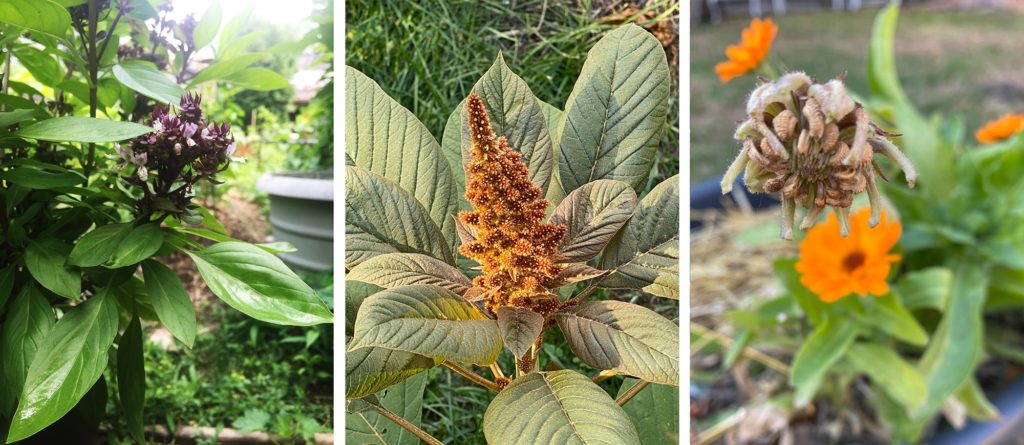
There are seeds in the making throughout the season! (left to right: thai basil, amaranth, calendula)
Step 2: Dry or ferment the seeds
Let seed pods and heads dry in a cool, dry spot, preferably indoors for more stable conditions. I like to leave mine in various bowls, trays and paper bags on my kitchen counter. For tomatoes, scoop out the seeds and put them through a short fermentation process that will break down the seed casing and release the seeds. Check out the Seeds of Diversity publications, have a look online. Here‘s one good example of how to prepare tomato seeds for storage
Step 3: Thresh
This is the process of “separating the wheat from the chaff” or getting the seed free of its casing. There are a bunch of ways to accomplish this. You can do it by hand, use sieves of different gauges, or by “winnow” which is using the wind to blow the chaff away. Professional seed growers have developed a variety of different machines to separate the seed from the chaff. Maybe you will too! Take a few moments to observe the colour, size and shape of each seed variety. They are each beautiful in their own right and once you get to know the differences between each crop you will be able to identify them without a label. This is especially true for beans that have varied colours, patterns, shapes and sizes, but not so easy with peppers, where a hot pepper seed and a sweet pepper seed look near identical. So make sure to label them even if you have your seed ID skills down pat.
Seed packing and labeling
Step 4: Package and Label
I like to package my saved seeds in paper envelops with openings on the short side, but regular old envelops for mailing letters works too. (The big opening means they spill a little more easily when sowing in the garden.) I avoid plastic bags because any moisture left in the seed or chaff will be trapped inside and may rot and ruin the seed. Make sure to note as much information as you can on the envelope. Don’t rely on your memory. Indicate the crop, the name of the variety, where it was harvested from and the date it was harvested. This will come in handy when you’re digging through your seed inventory in years to come and you’re wondering if the seed is still viable.
Step 5: Store
Store your packaged seed in a cool, dry place, preferably in low light. I like to use accordion folders and label each section alphabetically. I then put the folder in a Rubbermaid type container and stash it under my grow table, along with my potting mix and other indoor growing supplies. Some people like shoe boxes. Experiment with what works best for you.
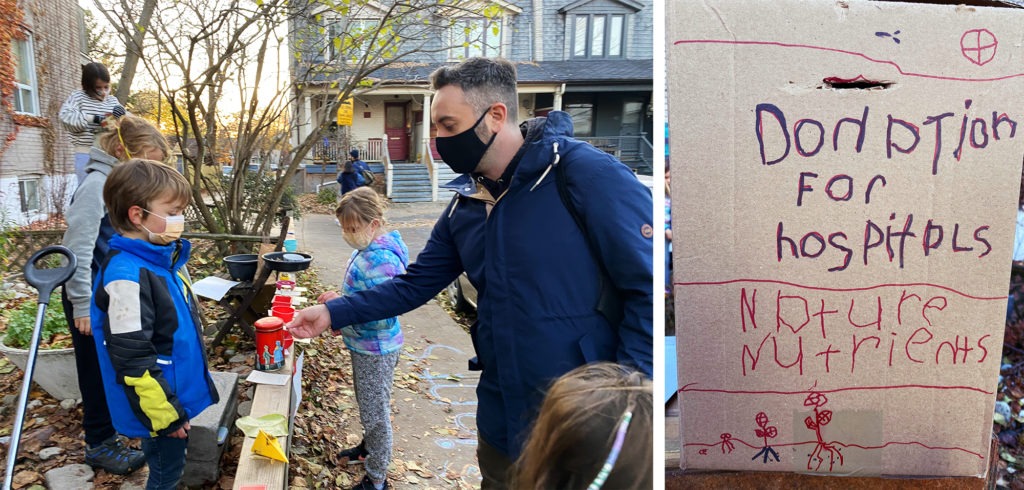
Step 6: SHARE!
Sharing your homegrown seeds is a great way to say I love you to family, friends, neighbours, and even strangers, as well as to the planet.
How Long Do Seeds Last?
Different seeds have a different shelf life. Most will last a least a year if properly stored but many varieties will last much longer. Here is a handy dandy chart for your reference.
If you are wondering about the viability of some of your stock, do a simple germination test. Take 10 seeds, lay them between two sheets of wet paper towel and lay the paper towel flat in an unsealed zip lock bag. Make sure you leave the bag unsealed so the seeds have some oxygen. Check back in a couple of days (longer for bigger seeds like peas or beans) to see how many seeds have sprouted. If 9 out of 10 germinate, you have a 90% germ rate. Pretty darn good!
Although winter is cold and wet and it gets dark at 4:30 in Zone 6A, cracking open your seed inventory and planning for next season’s garden will brighten any gardener’s day.
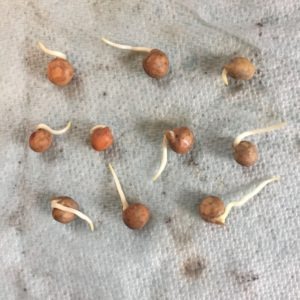 Germination test |
|
FUN FACT:Until recently, a 2000 year old seed was thought to be impossibly old for a viable seed. That is, until 2015, when 32000 year old seeds were uncovered in the Siberian permafrost, and using a variety of lab techniques, fully mature plants were successfully grown. 32,000 years old! |
How the heck do you harvest Amaranth?
Hi Jane,
Thanks for your question. Harvest amaranth when the flower heads flop over or just before. Slip a paper bag over the flower head and then snip it off the plant into the bag. Shake the head and run your fingers through to release the seeds. Remove the spent head from the bag and pour the seeds into a paper envelope! Repeat. There are also plenty of YouTube videos that demonstrate the process. Hope this helps. Happy harvesting! Arlene