
A homestead in the city? I can almost see Groucho.
Maybe so, but the urban homestead is quite real, if not yet popular.
So, what is a homestead? We all know what a home is – a place where you live, raise a family, eat, sleep, play, socialize, perhaps work. A homestead is all that and more – it’s also a place where you grow and preserve food, raise animals, make compost, create biodiversity, build for the future, set roots and stay put, reduce consumption, invest in the land, and ultimately, find an ever-deepening relationship with self-sufficiency and independence.
Homesteading is holistic living – subsisting in a manner that is both natural to us and to the world in which we live. In an urban setting, due to by-laws, proximity to neighbours, possible lack of space, and other environmental and circumstantial realities, we suggest a best effort approach.
Arlene and I started BUFCO about 11 years ago in large part as a controlled yet freaked-out response to talk of peak oil as explored in the documentary The End of Suburbia, and to the new onslaught of climate change concerns. Unknowingly, we were taking our first steps towards urban homesteading. Looking back, we have been able to distill our process down to ten basic steps we took to get us to where we are now. Granted, we are not (yet) hardcore homesteaders, but we are well along the path.
This blog post is about sharing those ten steps. Keep in mind, there are many different ways to approach your connection with homesteading. This is just our experience, formalized with the perfect vision afforded by hindsight.
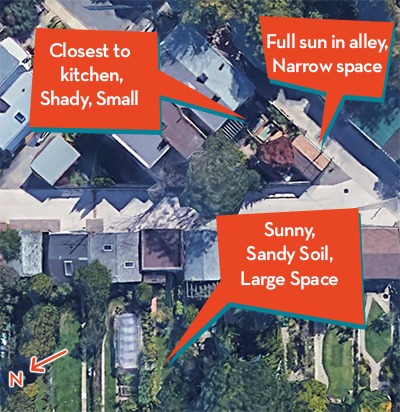
STEP 1 – ASSESS YOUR SITE
Where do you live? A downtown row-house? Condominium or rental unit? Sprawling suburban ranch-style home? Mid-town mid-sized Toronto home? There are few perfect urban homestead properties, although some certainly offer more than others. That sprawling suburban ranch-style place, for instance, might be best suited. But even with the most limited of spaces, there are still at least a few steps that can be taken towards self-sufficiency.
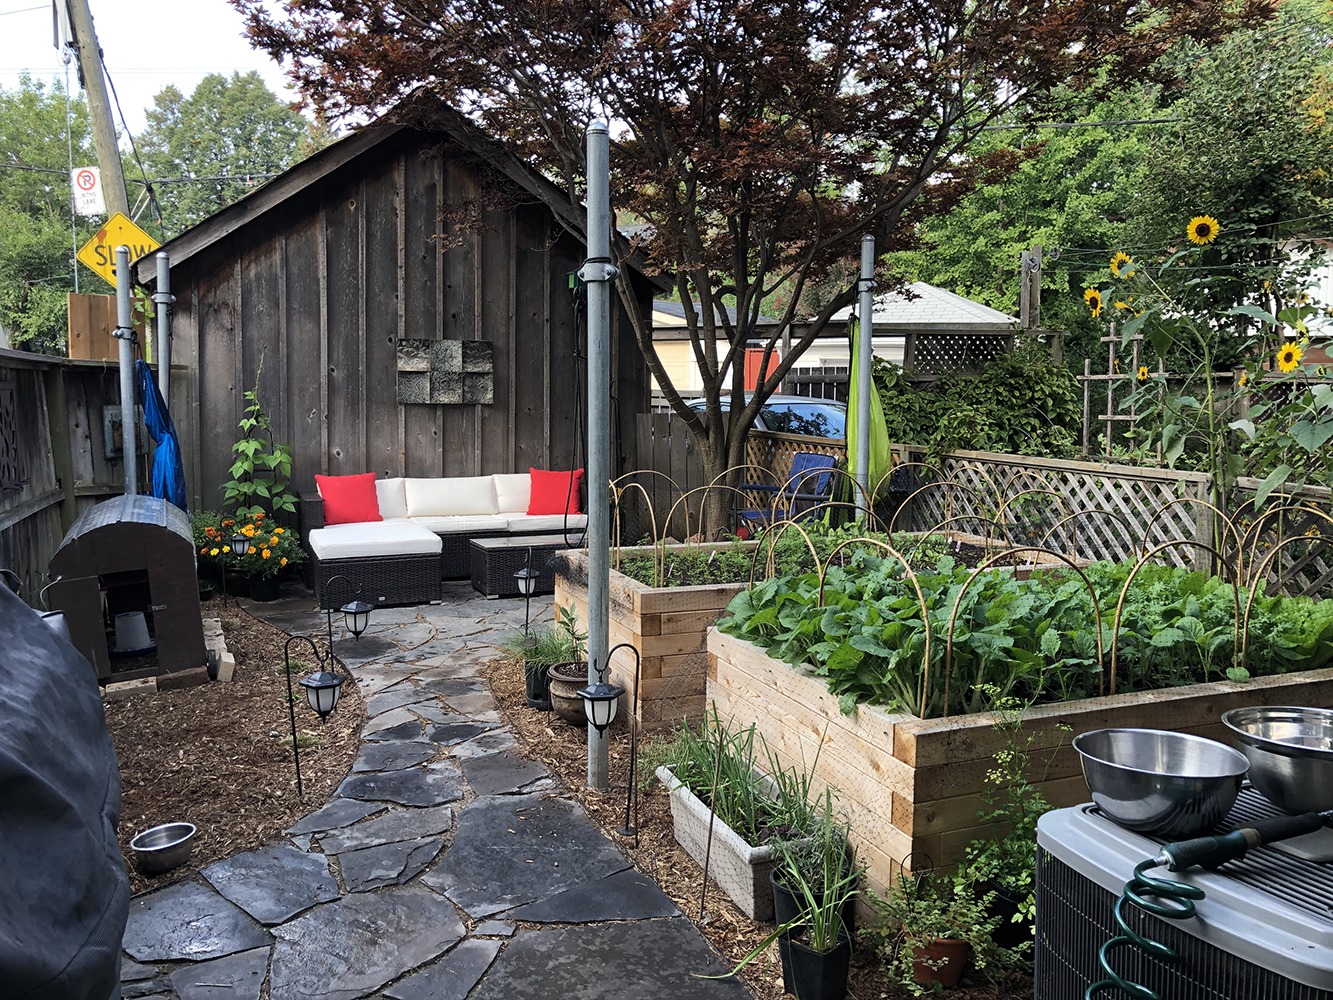
Start by making a list of all the different ways you might like to spend your time in your space – relaxing, socializing, cooking, fixing, playing, gardening…
Next, take stock of all the things your space offers – any and all resources and benefits you can recognize. Garden space, storage space, bright window sills, access to water, canning and preserving equipment, stockpile of firewood, tools… In other words, what do you have already that will help you achieve your long-term goal of increased independence?
At the same time, make a list of all things that are lacking or missing – the detriments: lack of sunlight to the yard, lack of storage space, fence is falling down, no gardening infrastructure, no water bib…
In both these lists, include your knowledge – do you know how to garden? That’s a benefit. Do you lack knowledge about preserving food or how to fix things? Those are detriment.
Also include your surrounding neighbourhood. Is there a community garden or neighbour’s yard nearby to help fill in your lack of garden space? Is there a community centre where they may offer canning and preserving workshops? If you’re lousy with tools, is there someone whose help you could solicit? Is there a ready supply of inputs nearby – stores with soil amendments, seed and seedlings? Tools and other supplies?
Recognize that knowing your detriments is actually a good thing. Listing things you’re lacking is a first and vital step towards filling in those gaps. If you don’t know your shortcomings, you’ll have a very difficult time making up for them. And remember, these lists will change as you learn, add more infrastructure, and forge new relationships. Keep the lists handy and watch as things move from the Detriments column to the Benefits column. A true confidence builder!
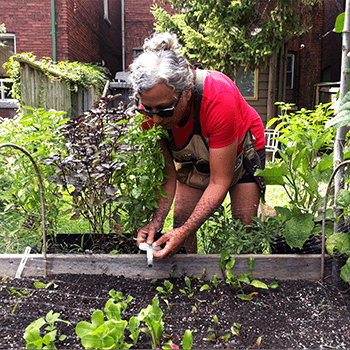
STEP 2: Establish a Place to Grow
Food gardening – small scale farming – is often the entry level step towards establishing a homestead. The basic and main considerations to establishing a place to grow, in no particular order include:
SUN: What crops will grow best on your site? For heat loving plants, you’ll need six or more hours of direct sun. However, if you have less, there is a host of delicious edibles that will thrive in as little as three hours of direct sun. You’ll need to account for obstructions such as trees and nearby buildings. Don’t ignore less obvious growing spaces – front yards, decks, balconies, rooftops…
WATER: If possible, choose a site close to a water source, or be prepared to bring water to the garden.
ACCESSIBILITY: How hard/easy is it to get to, and to get around the garden?
SOIL CONDITIONS: What is the nature of your native (already existing) soil? Dense and root-packed? Clay heavy? Swampy? Nicely structured and balanced? Or perhaps you have no soil – no yard – in which to grow. This consideration will lead to:
RAISED BEDS, BALCONY, OR INDOOR GARDENS: Raised beds are a quick and easy solution to poor native soil, and come along with all sorts of other benefits that you can see here. If you have good native soil, then removing some sod and boosting the soil biology with good quality compost, compost teas and mulch will bare great results. Those without yards but have decks, balconies, or rooftops can find good productivity with container gardening. And for those with none of these opportunities, indoor growing in sunny windows or under some simple grow lights will help keep your thumb green, albeit likely on a smaller scale.
KNOW YOUR SOIL: This takes your “Soil Conditions” point above and dives deeper. Learning basic soil science is a whole area of learning in and of itself that starts with the understanding that soil isn’t just dirt to grow stuff in. Soil a complete eco-system that encompasses all sorts of living organisms and matter. In healthy soil, worms, bacteria, fungi and so many other elements are all involved in a continuous process of communicating, tunnelling, burrowing, ingesting, digesting and excreting, procreating and dying, and round and round it goes. Through these processes, an environment is created that, when left alone, is completely self-sustaining. Just look at a forest, where human intervention is entirely unneeded – actually unwanted – for its success. Once we plug into a self-sustaining eco-system by doing things like growing food, it will become necessary for us up to help that soil flourish by doing things like adding compost and mulch, and by avoiding synthetic fertilizers that actually do more harm than good. Learning about your soil is a long-term endeavour during which you’ll discover all sorts of great and healthy soil inputs, amendments, and processes. Start your soil education journey with Elaine Ingham’s website. Elaine is widely regarded as the world’s foremost soil biologist. If you want even more we highly recommend the Organic Master Gardener course through Gaia College.
REDUCE DISTURBANCE: Just like in the forest, reducing or eliminating tillage – the turning of the soil – will help to keep the microbiology and structure of the soil intact.

STEP 4: WATER
As you learn about soil, you’ll soon see that healthy, well-structured soil has great water-holding capacity. Water is an essential pillar of life. Without it, no plants, no animals, no life.
Think about where is your water is coming from, particularly when it comes to your gardens. Are you relying on rainwater, in which case you’ll want rain barrels or an even larger catchment system? Do you want to take advantage of groundwater, in which case healthy soil becomes even more important? Most likely, in an urban setting you’ll be using a municipally supplied source – your water taps.
How you water your gardens is another important consideration, with options ranging from watering cans (labour intensive!) to hand-held hoses (our preference as it allows time for observing your plants), to surface irrigation (a great time saver and reasonably affordable), to in ground irrigation systems (easiest yet most expensive).
STEP 5: PROCESSING WASTE
No, not your waste, although that is a thing. I’m referring to things like garden waste, kitchen scraps (oil and meat-free) and perhaps animal waste if you have chickens, for example. Not everyone has the space for a composting set up, but if you do, it’s a great way to create a rich soil amendment for your garden, while simultaneously reducing demand on your city’s composting services. Composting can be as large as a three-bin setup in which inputs are moved from bin to bin to bin as it breaks down, to a single station conical composter, to an in-home worm composting bin that outputs some of the richest soil and plant food available: worm castings or vermicompost. Black gold. Yes, we’re talking worm poop.
Composting, like soil science, is an entire subject unto itself. Stay tuned for a compost-focused blog post coming later this season.
STEP SIX: ADOPT NON-CONVENTIONAL PETS
Friends of ours who live in a modest sized house with a small backyard in mid-town Toronto have egg-laying chickens, guinea fowl, a couple of ducks, fish used in a small aquaponic growing set up, a dog, and two small pigs. Yes, pigs. For an in-the-city homestead, this is certainly pushing the limits. Yet there have been no neighbourhood complaints, no visits from the police or animal control, or any other negative consequences. They have a regular supply of super-delicious eggs from the birds, great companionship from the pigs (yes, they are house trained, although their pen is in the garage), and endless entertainment. The backside output from all the animals except the dog gets picked up and composted, ending up as a rich garden fertilizer.
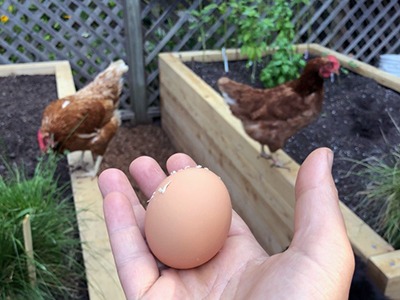
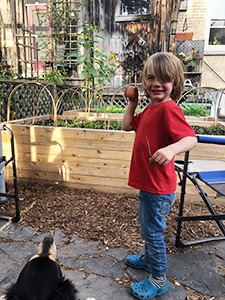
Certainly availability of space, municipal by-laws and perhaps reluctant neighbours may limit or even eliminate your ability to keep animals at home, but if you’re able to have even just a couple of chickens, as we did last year, you will discover the benefits with that first egg.
In Toronto, there is a Backyard Hen pilot program running March 2018 to March 2021, that allows backyard hens in four City of Toronto wards. Find out more here. If you want to step into this world, a good place to start would be with Rent the Chicken, a full-service company that supplies you with everything you need to keep chickens at home during the warm seasons.
|
|
|
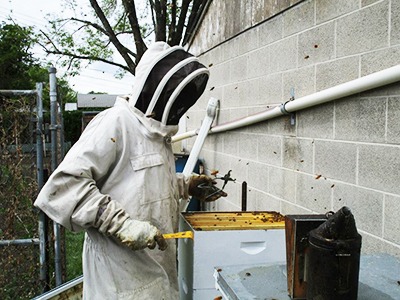
Bee keeping is becoming a more popular endeavour in the city too. There are some municipal restrictions in most cities and towns, so make sure to check in your area. In Toronto, there are a number of people and organizations that are helping people to get hives established, and they know the rules and regulations too. Right around the corner from BUFCO HQ in Roncesvalles Village, is BeeGrrl, an Ontario Bee Keepers Association member that sells all sorts of start-up equipment.
STEP 7: CONNECT WITH YOUR NEIGHBOURS AND YOUR NEIGHBOUROOD
Self-sufficiency does not necessarily mean hermitting, especially in an urban setting. Sure, hardcore county-based homesteaders can likely live without any outside contact or assistance, but that’s just not realistic for most city dwellers. So it’s good to know what your neighbours and your neighbourhood offer in terms of supplemental elements. On our street, we have someone who’s an expert baker and canner, an experienced electrician, a naturopathic healer, a few people (myself included) who know how to build and repair things. Arlene is one of a number of enthusiastic growers. We are fortunate to have a couple of neighbourhood parks nearby, three gas stations within walking distance, some excellent vegetable markets within a kilometer or less, a tool rental outlet literally down the street, and a great lumber yard and hardware store two blocks away. These are all resources that should all be recognized so they can be utilized when necessary. Knowing where your local police, fire, and ambulance stations are will lend a subtle peace of mind.
|
|
|
|
|
|

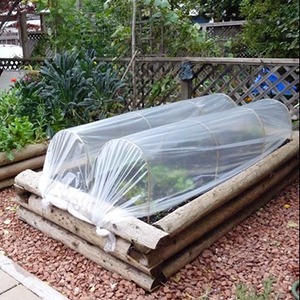
STEP 8: EXTEND YOUR GROWING SEASON
A 10,000 square foot climate-controlled greenhouse is the ultimate season extending device, but of course, it’s not very city-friendly. Even a modest 300 square foot hoop house such as the one we had up until last year is a challenge. However, there are all sorts of attainable and sustainable structures that allow you to have your garden planted and growing way before and long after the typical growing months. Cold frames are very popular devices, as are hoop tunnels. We developed our own hoop tunnel system because the cold frames we were using were too heavy to move and too bulky to store when not in use. Plus, opening a cold frame lets the warm air rush out all at once, whereas our hoop tunnels can be opened one small section at a time, thereby maintaining some of the warm air inside.
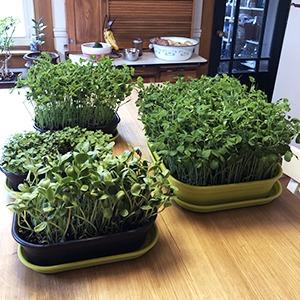
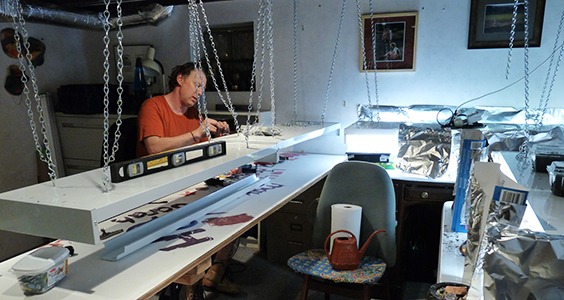
If you don’t have an outdoor growing set-up, or even if you do, there are some fun and simple indoor endeavours you can plug in to. Microgreens are a fun and easy way to grow a wide variety of super-nutritious plants that are ready for harvest in only ten days after planting. Everything from pea shoots to sunflowers to beets, basils, mustard greens, kohlrabi, arugula, radish, and many more, make great on-the-fly snacks and additions to soups, salads, and sandwiches. Microgreens can be grown in a sunny window or under grow lights. We have both a blog post and a video on the topic.
Salad greens, some herbs, spinach, Asian greens, arugula, and other leafy greens can be grown with great success indoors as well. You’ll need an indoor lighting set up, especially during winter, early spring and late fall. You can get a little more insight into lighting set ups in our blog post about starting seedlings.
STEP 9: FOOD PREP, PROCESSING, AND STORAGE
How many gardeners have experienced the heartbreak of wasted food due to an abundant harvest? At least some, likely most, and possibly all. I know we have. Other than eating and sharing your harvests, there are many simple and achievable steps to take that will keep your food accessible for months and months.
Tomatoes: Likely the number one “what am I going to do with all of these” vegetables. We simply freeze them in zip-lock bags. They lose their fresh texture when defrosted, but none of their taste, so they still make great soups and sauces. An overabundance of basil isn’t unusual either. It can be blended with a bit of olive oil and frozen in cubes that can be used later to make pesto, salad dressings, or any other basil-based recipe. Same with garlic. We grind it, mix it with a bit of olive oil, and freeze it flat in zip locks so it’s easy to break off a small piece when needed.
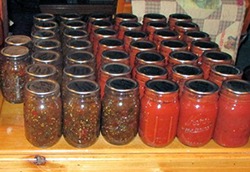
Preserving can be as easy as pickling veggies in a basic brine of water and salt, to a more involved process of heat-sealing mason jars full of fresh veg. Jams and jellies are a great way to save your fruits, including abundant harvests of ground cherries (try mixing in a few jalapeno peppers for an unforgettably delicious, savory variation).
Again, processing and storing foods is deserving of a blog post unto itself, but for now, this is your shallow dive.
STEP 10: SAVE YOUR SEEDS
Seed saving used to be a normal, obvious step in gardening and farming processes. If we are not careful, seed saving will become a lost art and we’ll all be gardening slaves to corporate conglomerates that are working to control the food and farming industries.
Saving seeds is not a terribly difficult endeavour, depending on the seed you are working with. In short strokes, it is basically a process of leaving some the most choice fruits of a plant on the vine until they’re dry and crispy. Carefully remove them from the plant, crack the seed pod or flower head open, and collect the seed. Do one plant variety at a time to avoid accidentally mixing seeds, and harvest using a bowl in which to catch the seeds.
Saving tomato seeds requires a different process of rinsing, letting sit to develop surface mold then rinsing, repeating, and then drying. Not difficult, but certainly more involved.
Pack seeds in paper envelopes and store them in a cool, dry place. Label the envelop with the plant name and variety, and the date of harvest.

So there you have it, our Top Ten Steps to Growing Your Own Urban Farm. Remember, it’s best effort. Have fun and just take it a step at a time.
Love This!! Thank you for sharing this! I look forward to connecting, visiting and learning how to replicate all of this! 🙂
Hi Louise. Thank you so much for your lovely feedback. We’re thrilled this article has meaning for you.