Attention garlic lovers! Why buy grocery-store garlic grown half way around the world when you can grow your own right at home? It’s an easy-to-grow, low maintenance crop that produces two harvests – first the edible flower stalk (called a garlic scape) in early June, and then the fat, juicy bulb in late July to early August.
|
|
|
It’s so much fresher and more delicious when you plant garlic yourself in your own garden. All you need is a small space to grow with at least five hours of direct sun daily, quality seed garlic, fresh soil fortified with well composted manure, and a few handfuls of straw to use as mulch.
Where to Plant
Garlic can grow in raised garden beds or directly in the ground, although we have not yet been successful growing it in containers, likely due to poor drainage and fluctuating freeze/thaws which lead the cloves to rot. When garlic is planted in the ground or in raised beds that are open to the soil below, the surrounding soil temperature remains fairly consistent.
Crop rotation is one of the main tenants of organic gardening and a great way to stay one step ahead of pests and diseases. If you have grown garlic before, be sure to plant it in a different location this season. If you have only one garden bed, plant it in a different location within the bed. Or consider adding or establishing another garden bed. Garlic is a great companion for most plants and because it builds up sulfur which can act as a natural fungicide. However peas, beans, parsley and sage are not such happy neighbours.
Source Healthy Seed
There is a dizzying selection of garlic varieties to choose from – Sicilian, Czech, Polish, Israeli, Cuban, Korean – you name a country and I’d wager they have a special variety of their own. Each has their own unique properties and flavour profiles. Some are spicy, some are sweet. Some are hardneck varieties that produce an edible flower stalk (the scape), while others are soft neck varieties which don’t produce a flower stalk. Soft neck varieties generally store for longer and are better for braiding together. Some have multiple, tiny cloves per bulb, while others have as few as two giant cloves.
No matter what variety you choose, it’s important to know where your seed garlic comes from to ensure the bulbs are disease-free. Stem and bulb nematodes are probably the most destructive pest for garlic and can cause significant losses to your crop. You can usually find fresh garlic at your local farmers market or you can pre-order on line from garlic growing specialists like The Cutting Veg.
We source disease-free, certified organic seed garlic from a local farmer who produces a hardneck variety called “Music”, which is particularly well suited to our local growing conditions in and around Toronto. Music has a deep, rich flavour with very little “heat”. It produces 4-6 extra-large cloves per bulb. The bigger seeds generally produce bigger bulbs. And bigger cloves mean less peeling in the kitchen!
How Much to Plant
Keep in mind, your garlic crop will occupy precious real estate in your garden during the spring and summer months, so ask yourself how much garlic you want compared to tomatoes, lettuces, cucumbers, squash, kale, etc.
One hard neck garlic clove yields one scape and one bulb. We like to seed 4-5 cloves per square foot, so each square foot yields 4 to 5 bulbs and 4 to 5 scapes. If you like big bulbs, plant fewer cloves per square foot. We prefer to sow more densely because we like a lot of scapes and are willing to accept slightly smaller bulbs.
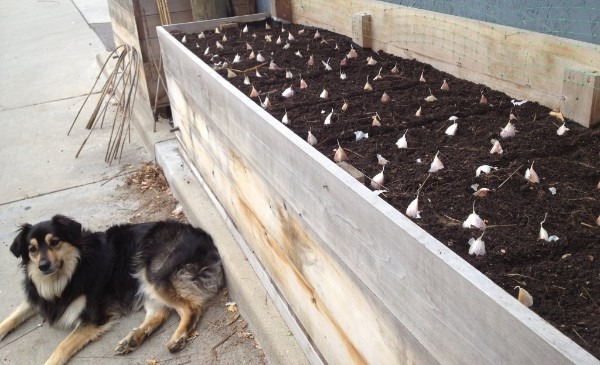
When and How To Plant
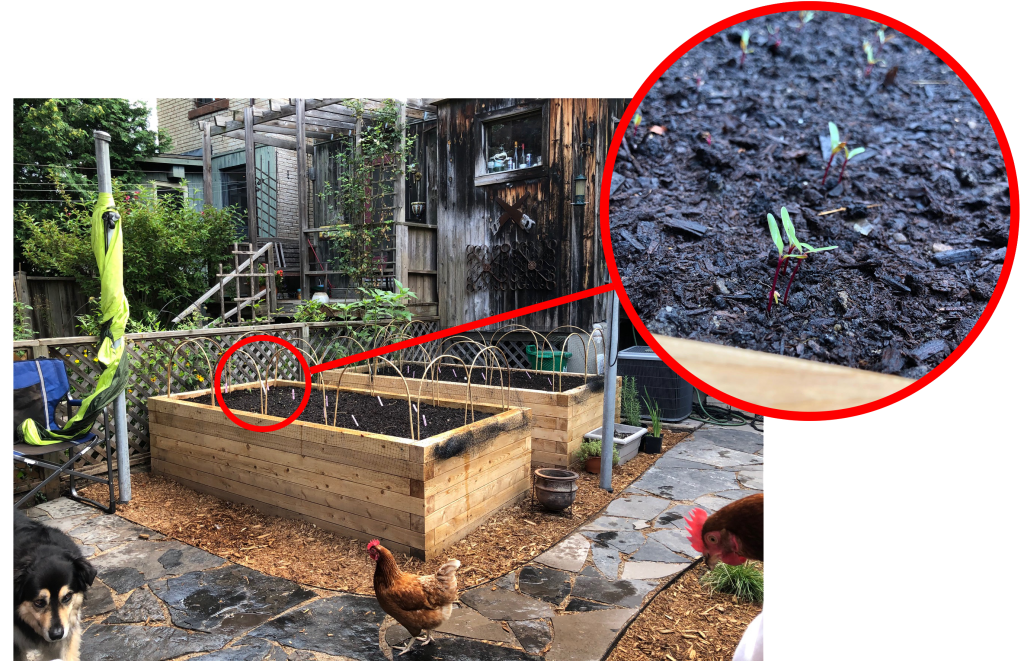
Autumn in Zones 5/6, is the perfect time to plant garlic for harvest the following summer.
Start by cleaning up your chosen site, removing all the spent plant material and feed the depleted soil with top quality Vermicompost (worm castings). We like Jocelyn’s Soil Booster, castings produced by red wigglers that are fed vegetable scraps. Seed the garlic, pointy side up about three to four inches deep, then cover with soil. The garlic seeds will set root and lay dormant over the winter.
Cover the beds with straw mulch to protect the soil and the seeds from wind, UV rays, erosion and to prevent weeds. The mulch also provides food for the organisms living in the soil that are critical to soil health. We like to cover the straw with bird netting (optional) to keep the straw in place and help prevent critters from digging and using the bed as a litter box. An important note to remember for early spring: the bird netting must be removed to allow the garlic stalk and leaves to emerge through the straw without getting choked. The straw remains on the bed throughout the growing season and right up until harvest in early August.
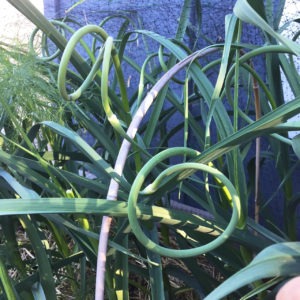
Harvesting Scapes
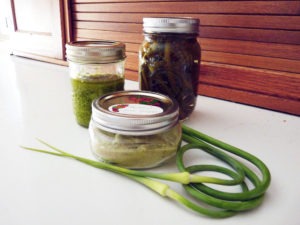
Garlic scapes are the flower stalks that emerge from hardneck garlic in mid to end of June. They can be harvested for a delicious mid-summer treat or they can be left to develop until they flower and produce “bulbils”, miniature garlic cloves used as seed for the following season. If the garlic is allowed to flower however, all the energy goes into the making of the seed and therefore there will be little to no bulb to harvest later. We routinely harvest garlic scapes which allows the garlic to develop multiple cloves that result in a harvest of fat, juicy bulbs four to five weeks later. The scapes make a delicious pesto, can be grilled whole on the BBQ, dehydrated into a homemade garlic powder or pickled for a spicy summer cocktail garnish.
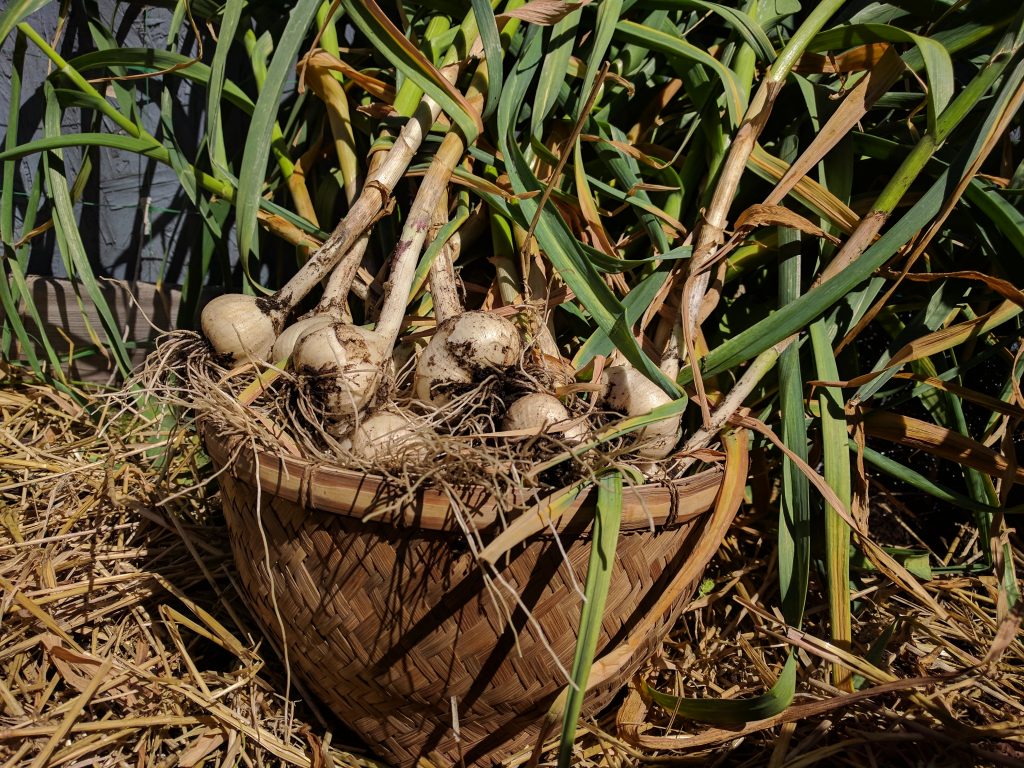
Harvesting Bulbs
It’s time to harvest garlic when the green leaves begin to turn brown and die back. The experts advise to stop watering garlic two weeks before intended harvest so they will cure (dry for storage) more easily. The best way to determine if the garlic is ready for harvest is to gently loosen the soil around the bulb with a pitchfork or trowel and pull one out. Have a look at the bulb and if it has developed into multiple, nicely defined cloves then it’s ready. If the garlic is left in the ground too long, the outer skin begins to rot which makes the bulb a poor candidate for proper curing and storage. But not to worry, it may not store well but it can be eaten right away!
Freshly harvest garlic is delicate and bruises easily, so be gentle when harvesting and curing. And be sure to save some of the biggest, best-cured bulbs for planting in the fall and you’ll never have to buy seed garlic again. (FYI, there is no difference between seed garlic and garlic other than size – for planting, the bigger the better.)
Succession Planting a Winter Garden
Once the garlic is harvested, a brand new plot of garden real estate has opened up, and a wonderful opportunity to sow cold hardy crop awaits! Beets, carrots, radish, cabbage, kale, lettuce and other greens can all be planted for a late season harvest. If you’re looking for inspiration, check out our early spring blog post where I list my favorite cold hardy crops.
When considering what to plant, have a look at the number of Days to Maturity and if it’s within 45-70 days you should be successful. You can sow the seeds directly in the soil or you can start seeds indoors under lights and then plant them out as seedlings. Make sure to feed your soil with a quality compost first. You can also extend your harvest well into the winter by protecting your plants with hoop tunnels or cold frames.
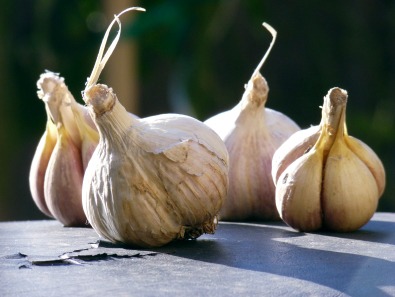
Curing Garlic
You can use freshly harvested garlic right away or you can “cure” your garlic which is essentially drying the outer layers of the bulbs so they can be stored for winter use. Choose a cool, dry location either indoors or out. Keep the bulbs out of the sun.
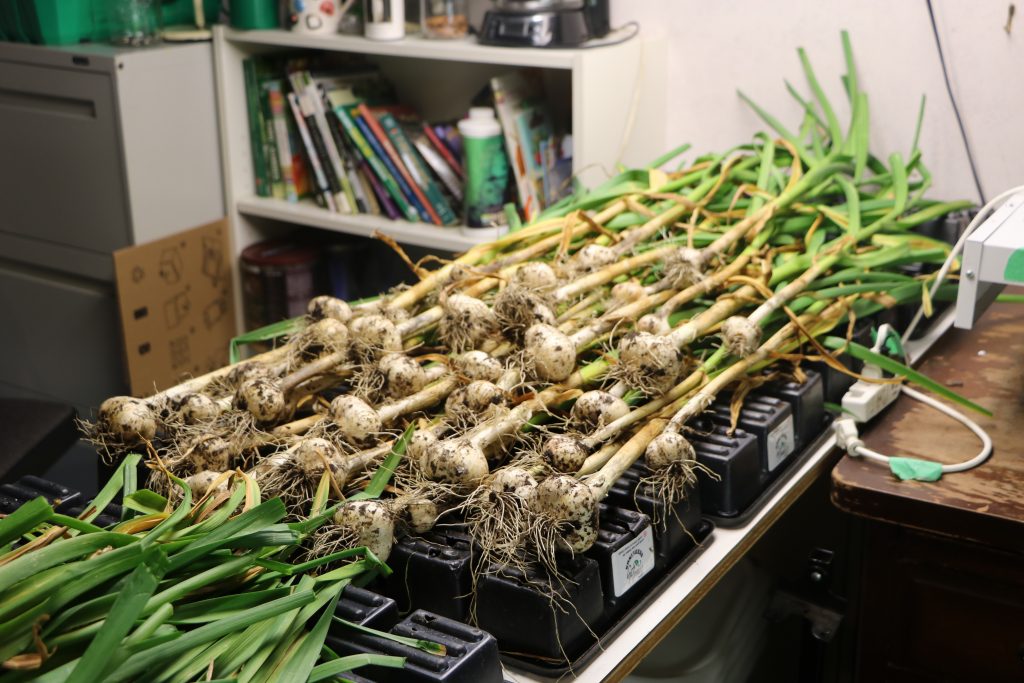
You can tie and hang the garlic in small bunches, or lay it flat on a rack to ensure even airflow. Leaving the roots and bits of soil on the bulbs will help preserve them, so no need to wash or trim. Remember, until cured, it’s delicate and bruises easily.
We don’t have a whole lot of space outdoors so our basement office is an ideal location for curing garlic. The ceiling is too low for hanging so we let them cure on a table using 10”x20” growing trays turned upside down on the table. We gently lay the garlic flat on the trays, making sure that each bulb has enough space around it to dry out evenly. In three to four weeks, the bulbs will be dry and ready to store. Once properly cured, you can expect your bulbs to last until February.
So there you have it. Easy to grow, easy to store, and right from your own yard. If you’ve grown garlic before, you know how great it is. If this is your first time, your first taste will leave you wondering what you were waiting for!